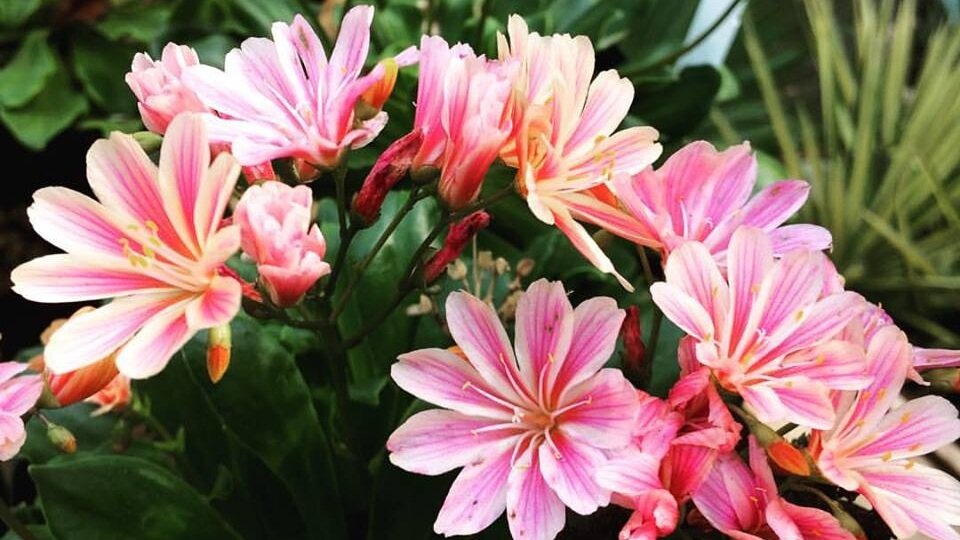

Breaking Down Fall Composting
Fall is a great time for composting. Not only for building your own bin with colorful fallen leaves, but also for top dressing your garden! Spreading compost over a garden bed, then covering it with mulch will encourage growth of soil organisms that will be super beneficial come springtime!
Break-down of Benefits:
• Encourages the growth of earthworms and other macro-organisms, whose tunneling makes room for water and air, making way for optimum root growth
• Provides nitrogen, phosphorus, potassium, sulfur and micro-organisms that are essential for plant growth • Acts as a glue, holding water and soil particles together, and makes soil resistant to erosion
• Binds itself to polluting metals, pesticides and other contaminants to prevent them from washing into waterways or being absorbed by plants
• Suppresses soil-borne diseases and plant pathogens (a number of plant and lawn diseases are suppressed by micro-organisms found in compost!)
Practice a technique called "side dressing". Apply a layer of compost a few inches away from the plants, protecting delicate plant stems from active microorganisms. This way, the compost is applied as a mulch and it reaps multiple rewards!
Seacoast Compost
Made in Oregon, certified organic and biodynamic. They make use of “waste” from three major Oregon Coast Industries. Fish, shrimp and crab from seafood processing, along with cow manure and bedding from organic dairies, as well as Red Alder hardwood from the lumber industry. They add in some homeopathic preparations like yarrow, chamomile, nettle, oak bark, dandelion and valerian to enliven the whole mix and stimulate plants to reach their full potential in their environments.
Malibu Compost
Made in California, certified organic and biodynamic. Their farm-made compost combines organic dairy cow manure, straw, wood chips, and biodynamic concentrations of yarrow, chamomile, valerian, stinging nettle, dandelion and oak bark. They proudly do not use products with synthetics, greenwaste, pesticides, hericides, growth hormones, and sewage sludge.
Sources:
King County Composting
SeaCoast Compost
Malibu Compost

A Trove of Cloves!
In addition to garlic being mighty yummy and great for our immune system, it is also a wonderful pest (and vampire) deterrent. Adding garlic around your garden and in different beds will be super handy when it comes to the amount of pests you have to manage come Spring and Summer.
Planting Instructions:
Break bulbs into individual cloves right before planting. Leave the papery skin on.
Plant 6-8" apart and 3-4" deep in well drained soil.
Water gently to settle the soil
Mulch the bed well with 3-6 inches of weed-free straw, hay or cut grass (this will also assist in easier harvesting in the Summer and deterring critters such as squirrels). Even as air temperatures drop, the soil will stay warm enough for the newly planted cloves to establish roots before the ground freezes.
Tips from Great Northern Garlic
Sometimes you'll see some green shoots form in fall; that's fine and won't harm plants. They'll begin growing in earnest in spring. If your soil needs a boost, add organic compost or all purpose fertilizer before planting.
You can soak the garlic cloves in a fish emulsion or liquid kelp fertilizer overnight before planting to improve health of the cloves. Fertilize again in the Spring. Harvest in early summer, generally around the 4th of July, or depending on when half of the leaves have died.
Harvesting
Each leaf above ground indicates a layer of protective paper wrapped around the bulb. A reliable harvest indicator is when half the leaves have died off, and half are still green. The leaves start to die off from the bottom up.
Stop watering 2 weeks prior to harvest and do not wash your garlic or remove the bulb wrappers after harvesting.
Storing
To store garlic, the process is calling curing. Leave the stalks and roots on the bulbs and either bundle 8 to 10 garlic stems together, tie with twine, and hang bulb-side down in a cool, dark space, like a basement, or lay the garlic flat on a raised screen in a single layer. Allow the bulbs to cure for three to four weeks.
Varieties Available at Urban Earth:
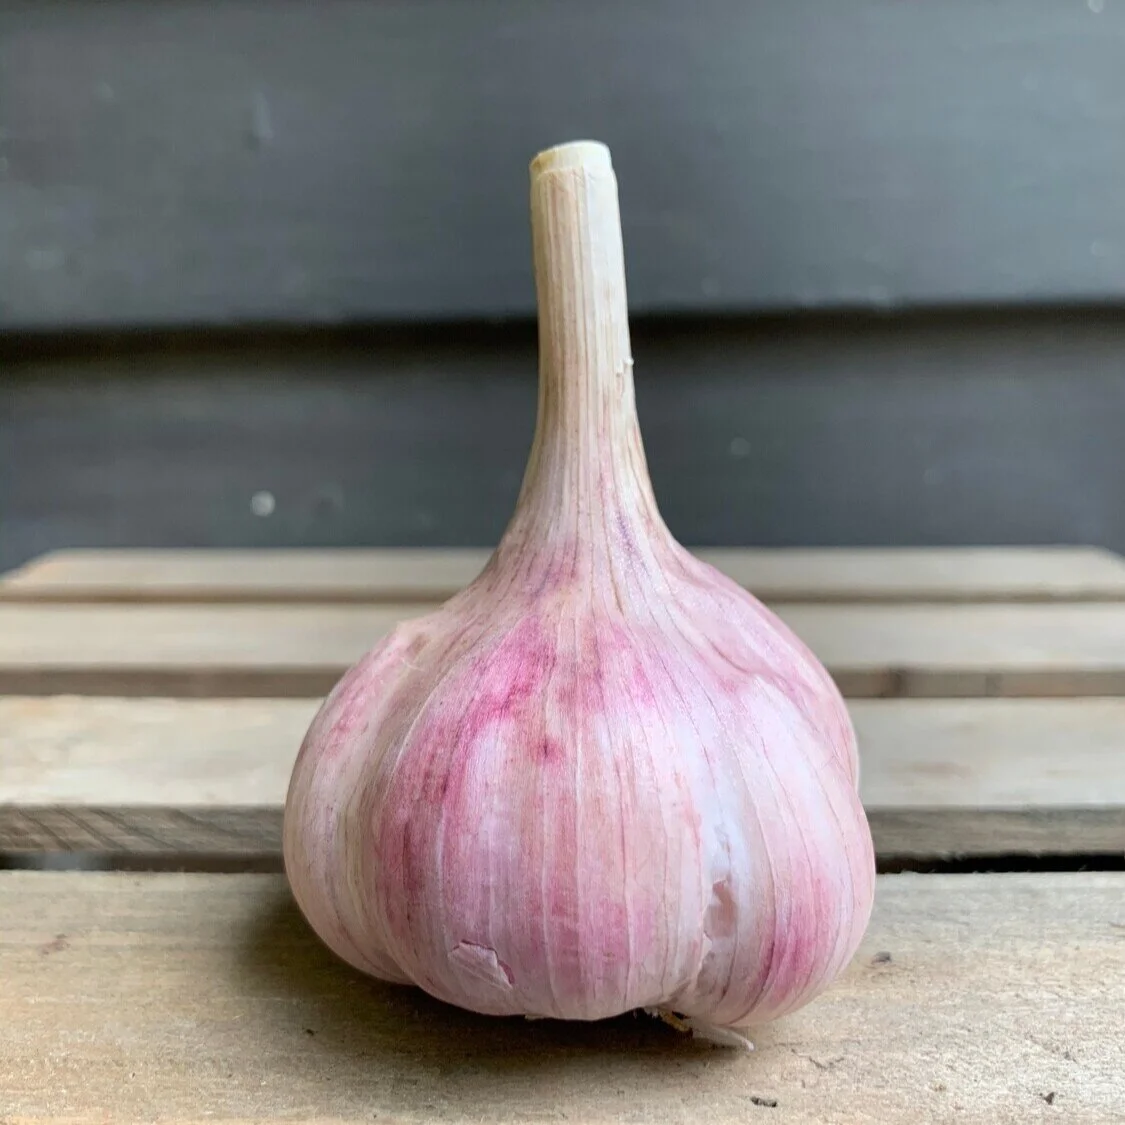
Striped violet wrappers house purple tinged cloves that explode with a fiery flavor that mellows out nicely to a rich garlic aftertaste. Stores well. Approx. 7-10 cloves per bulb and approximately 7-8 bulbs = 1 pound. Planting 1 pound will yield about 4-7 pounds.

Russian Red garlic has big bulbs that have a slightly purple skin that wraps the bulbs and cloves. This variety is a great garlic to grow for soil conditions that are slightly damp. Russian Red is one of the most flavorful heirloom garlic varieties. Approximately 6-9 cloves per bulb and approx. 7-8 bulbs = 1 pound. Planting 1 pound will yield about 4-7 pounds.

Great for culinary use and is an early season garlic harvest! This variety is one of the most commonly grown varieties in the U.S., and for good reason. It is a medium, easy to grow softneck, with a nice mild flavor and excellent storage ability. Approximately 8-12 cloves per bulb.and approx. 6-7 bulbs = 1 pound. Planting 1 pound will yield about 6-10 pounds.

Large cloves streaked with hues of rose, this beautiful Silverskin variety has a robust flavor. Great for cooking and long storing, up to 12 months! Excellent for braiding. Approximately 10-20 cloves per bulb and approx. 5-6 bulbs = 1 pound. Planting 1 pound will yield about 6-10 pounds.
All of our garlic is Certified Organic and Grown in Oroville, WA.

Water Wisely
July flew by in a beautiful buzz, and August is coming in hot (quite literally). With warmer temperatures and longer sun exposure, your plants are thirsty! Now is the time to introduce water wise techniques in your urban slice of earth.
Water is a precious resource and absolutely vital for keeping your vegetable garden happy. Wise watering techniques conserve water, save money, produce bigger yields and promote healthy plant growth. Here are five general guidelines to keep your garden thriving during these warmer months:
Healthy Soil: Establish retentive soil that slowly releases water to the plants. A top layer of mulch will also reduce the amount of water and weeding needed.
Timing: Water before 10AM. This will lead to less evaporation and more water absorbed by the plants. Leafy greens love an evening watering to cool down their soil and prevent plants from bolting.
Water Slowly: Water slowly, deeply, and less frequently. This allows plants to develop large root systems. Focus your watering into the soil, not onto the plant.
Be Consistent: Group plants by their watering needs. This is a great way to make watering easier from the get-go. Each vegetable or annual flower plant should receive about 1-2 gallons of water per week, spreading it out so you water the same amount every couple of days.
Equipment: A leaky hose is the quickest way to waste water. Be sure your hoses and faucet are in good working order. Simple dial timers and drip irrigation are great for very direct and accurate watering. Rain barrels are also a great way to water the natural way.
Next, we’ll talk about Xeriscaping! This is the use of drought tolerant, often native plants in your landscape. (Don’t picture a desert, we promise there are colors and flowers involved!)
Links:
The Seattle Conservation Corps Rain Barrels and Supplies for Sale
Tilth Garden Alliance
Photo by Randy Fath on Unsplash

Seed Journal Freebie!
The best way to learn about seeds is to plant them, care for them, and then watch the magic unfold! Whether you plant your seeds in a small pot filled with soil, or in an outside urban garden, it is so rewarding to grow food and flowers from seeds. Use our seed journal to keep track of your gardens growth.
Keep track of your gardens progress with this FREE seed journal!
The seed journal will be available to download as soon as you enroll.

Care for the Prayer ~Maranta leuconeura~
Caring for you Prayer Plant and identifying potential issues. For more information come chat with us at the shop!
Common name: Prayer Plant
Scientific Name: Maranta leuconeura
Type: Herbaceous perennial
Family: Marantaceae
Native Range: Brazil
Zone: 11 to 12
Height: 6”-12”
Spread: 6”-12”
Bloom Time: Produces white flowers, though rarely blooms indoors
Sun: Part shade
Water: Medium
Maintenance: Low
Your Prayer Plant prefers:
Temperatures that do not dip below 60 degrees F. Zero tolerance for frost.
A soil-based potting mix.
Bright indirect light but not strong direct sun.
→Too much sun will bleach out the attractive leaf colors.
Consistently moist but not soggy, well-drained soil but, drier soil during winter dormancy.
→Keep in mind, however, that dry air can also be a problem in winter; therefore, placing the prayer plant among several houseplants can help create more humid conditions, misting daily with warm water.
A humidified room and/or standing in a tray of wet pebbles to increase humidity.
→However, do not allow the prayer plant to sit directly in water.
To be fertilized monthly during the growing season, but a reduction in soil moisture and substantially reduced fertilizer applications from autumn to late winter.
→Use warm water and feed prayer plant houseplants every two weeks, from spring through fall, with an all-purpose fertilizer.
To be propagated by cuttings or division of the rhizomatous root structure
What’s wrong with my plant?!?
Exposure to bright, direct sunlight will cause browning at the tips of leaves. Move plants to a shady spot where the suns rays cannot come into direct contact with leaves.
Over watering is a VERY COMMON problem for houseplants and the Prayer Plant is no exception. Over watering can cause older, lower leaves to turn brown and die off. Try letting the plant dry down over a few weeks then begin watering regularly with minimal applications every two weeks. If the leaves begin to wilt, water moderately. Make sure there is good drainage in your pot or planter. If not, consider switching to a pot with better drainage OR come in and take advantage of our POT DRILLING SERVICE at Urban Earth Nursery!
Chlorosis: Iron chlorosis affects many kinds of plants and causes unsightly yellow leaves and eventually death. So it is important to correct iron chlorosis in plants. The most obvious symptom of iron deficiency in plants is commonly called leaf chlorosis. This is where the leaves of the plant turn yellow, but the veins of the leaves stay green. Typically, leaf chlorosis will start at the tips of new growth in the plant and will eventually work its way to older leaves on the plant as the deficiency gets worse.
What Does Iron Do for Plants? Iron is a nutrient that all plants need to function. Many of the vital functions of the plant, like enzyme and chlorophyll production, nitrogen fixing, and development and metabolism are all dependent on iron. Without iron, the plant simply cannot function as well as it should. Rarely is an iron deficiency in plants caused by a lack of iron in the soil. Iron is typically abundant in the soil, but a variety of soil conditions can limit how well a plant can get to the iron in the soil. Iron chlorosis in plants is normally caused by one of four reasons: Soil pH is too high; soil has too much clay; compacted or overly wet soil; too much phosphorus in the soil
Bring your plant in to Urban Earth Nursery if you suspect over exposure, over watering or chlorosis, we have a team of plant people ready to help identify problems and discuss solutions!
Spider mites, mealybugs and aphids are all pests that enjoy munching on your prayer plant so keep and eye out for insect activity and send us pictures of the damage if you need advice on how to exterminate these little critters!
Sources and Resources:
Missouri Botanical Gardens:
http://www.missouribotanicalgarden.org/PlantFinder/PlantFinderDetails.aspx?kempercode=b604%22
Read more at Gardening Know How: How To Grow Prayer Plants & Prayer Plant Propagation https://www.gardeningknowhow.com/houseplants/prayer-plant/maranta-prayer-plant-peacock-plant.htm

For the Love of Plants...
To nurture plants is an interesting thing. We put such concern and will into a being that is propagated as a commercial product. The little green friends we keep warm on our window sills wouldn’t last long on their own here. Meanwhile, deciduous trees are overlooked in winter because of their crude nudity, bulbs go completely dormant and unnoticed while flowers become a distant memory!
As plant parents, we take home plants, aiming to provide the ideal environment for them while improving our connection to nature. We grow attached to our plant families and feel the urge to nurture them- though, sometimes we neglect them b/c we are human! We make an investment and are rewarded with the responsibility of keeping something alive & thriving! These little responsibilities we take on teach us life lessons and offer us beautiful experiences in exchange.
All plants are different and uniquely beautiful but there are occasions when we cannot place the same value on all products. Our nursery is a stop over for plant babies! We take our jobs pretty seriously in stewarding them until they find forever homes. But as commercial products they are required to retain their value. As a result there are plants that need to be taken out of inventory. What happens next is seemingly mundane and surprisingly unsettling.
This feeling is familiar for me (Lisa). I’ve had it before while farming. You have lower quality product and a considerable amount of it. This product received the same amount of attention and input as the acceptable product. Selling the lower quality product is bad for marketing and not fair to customers. Labor is paid for and emotional investments are made when we depend on living things for an income. On top of that you feel, see and understand the value of this thing you must now discard. One arrives at this point of impasse where you know you cannot sell the three pounds of carrots or the house plant or the annual vegetable start for full value but you cannot bring yourself to just chuck that little life into the compost. It’s too wasteful, it just seems wrong. We’ve decided to launch a Plant Adoption Program! Come see us to learn more!